Achieving a perfect French manicure at home can feel like a daunting task, but with the right tools, it becomes effortlessly chic. A french tip tool for nails is specifically designed to help you create that iconic crisp, white tip with ease and precision. At Infinity Salon Jaipur, we understand the desire for elegant, professional-looking nails, and we’re here to guide you through the world of French tip tools. Whether you’re a beginner or a seasoned DIY nail artist, having the correct equipment makes all the difference in achieving that salon-quality finish right from your living room. This comprehensive guide will explore the various types of tools available, how to use them effectively, and provide tips to perfect your French manicure.
Understanding various types of french tip tools for nails
The market offers a diverse range of french tip tools for nails, each designed to cater to different preferences and skill levels. Knowing the distinctions between these tools is crucial for selecting the one that best suits your needs and helps you achieve your desired nail look. From silicone stampers to specialized cutters, each tool provides a unique approach to creating the classic “smile line” that defines a French manicure. Exploring these options ensures you can find the perfect match for your at-home nail artistry.
Exploring silicone french tip stampers for easy application
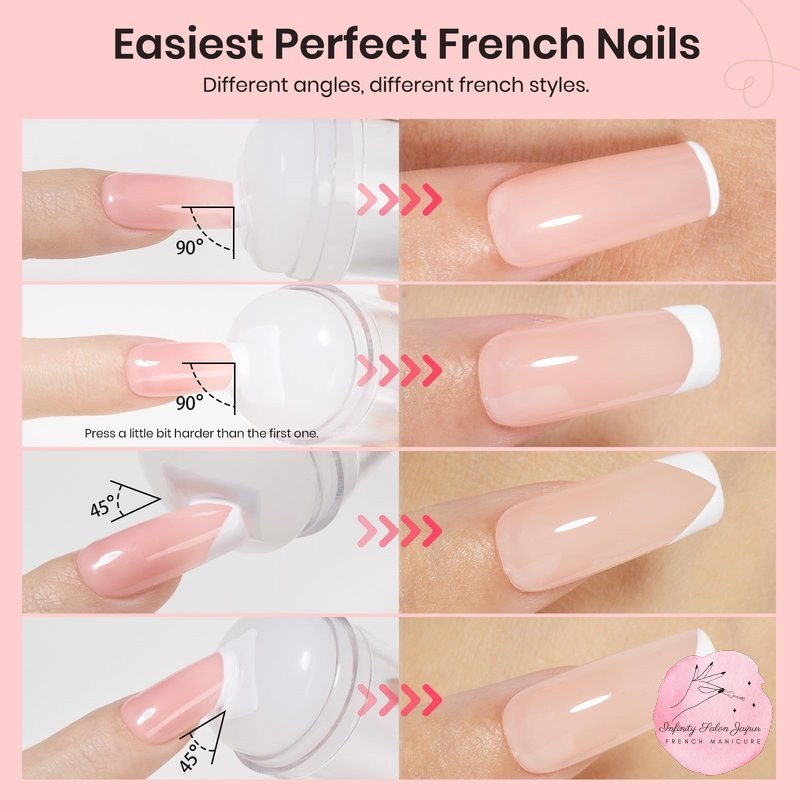
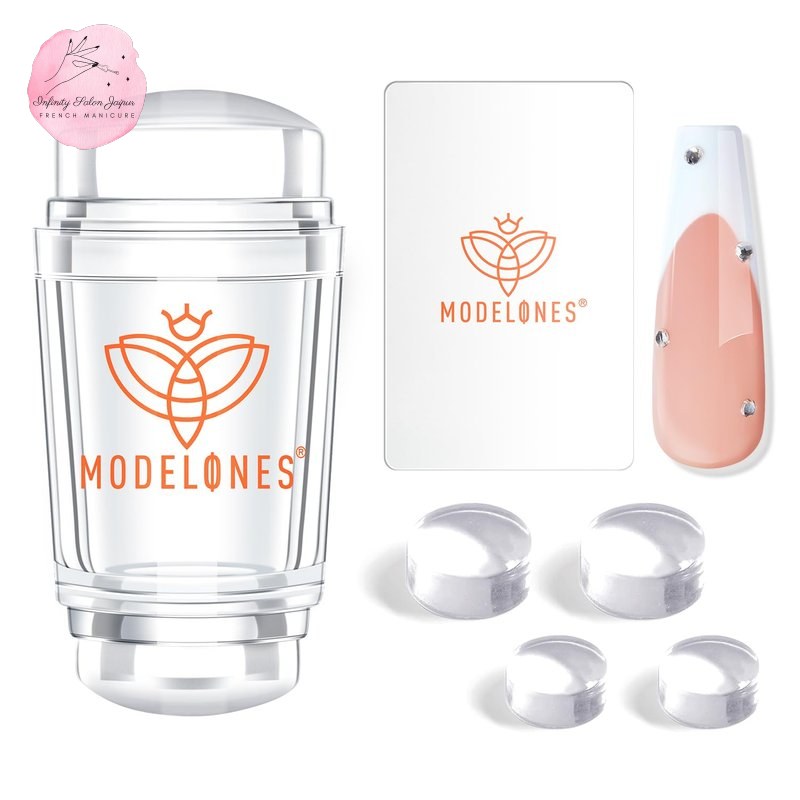
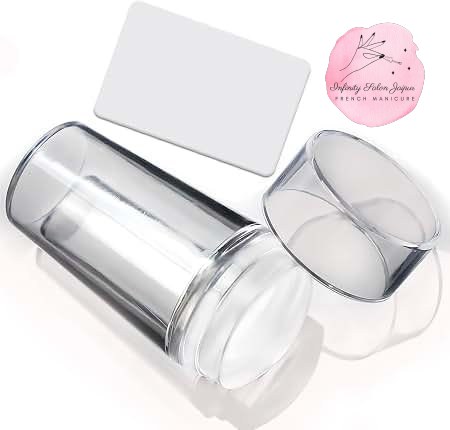
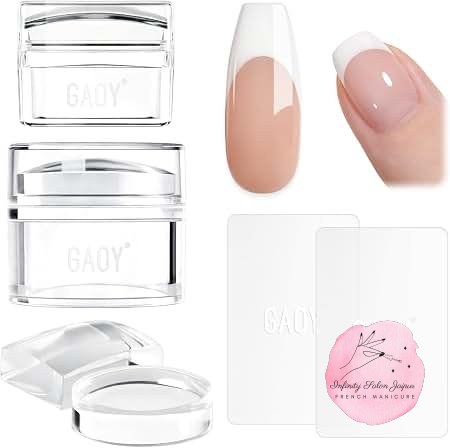
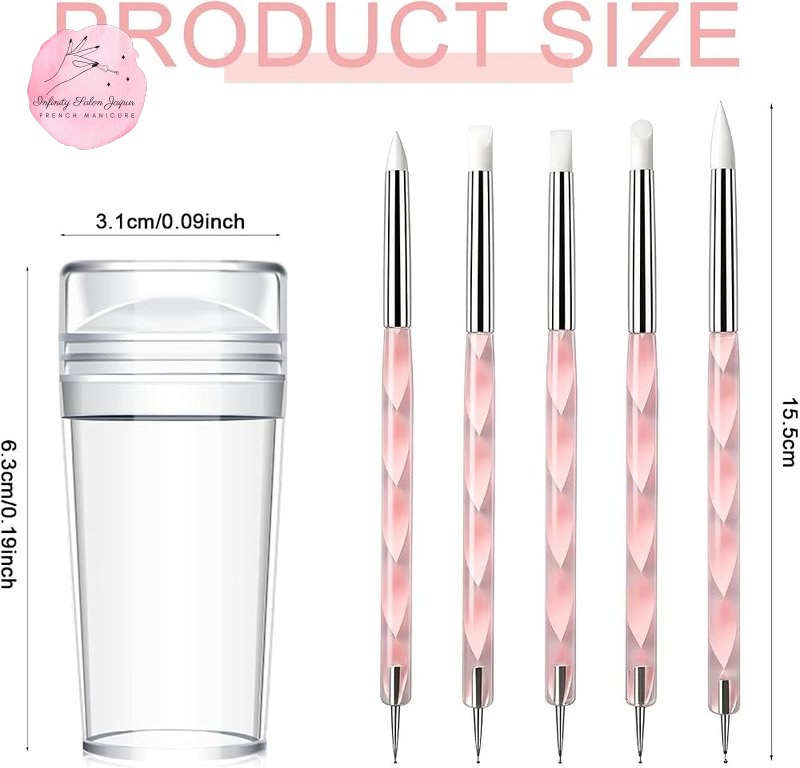
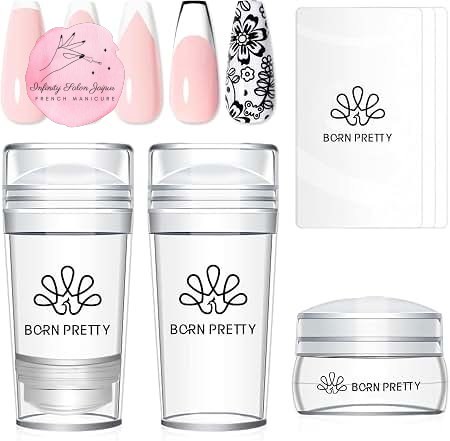
Silicone French tip stampers are incredibly popular, especially among beginners, due to their ease of use and versatility. These tools typically feature a soft, clear silicone head that allows you to simply dip your nail into polish applied to the stamper, creating a perfectly curved tip. The transparency of the stamper head ensures precise placement, making it simple to achieve a consistent smile line across all your nails. Many kits come with different sized heads, allowing you to customize the depth and curve of your French tip. This method significantly reduces the time and effort required for a professional-looking finish, taking the guesswork out of achieving that classic French manicure.
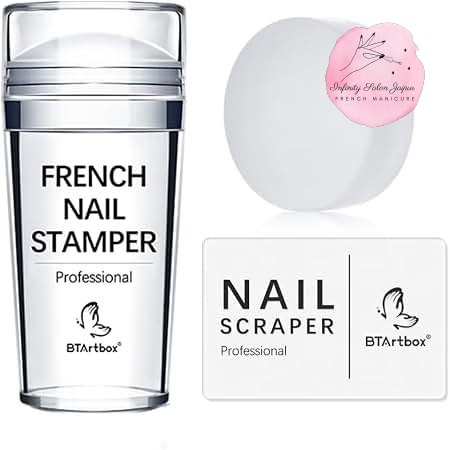
These stampers are also excellent for use with various nail polishes, including gel and traditional lacquer. The flexibility of the silicone material makes it adaptable to different nail shapes and sizes, ensuring a smooth and even application every time. With a little practice, you can master the technique and enjoy beautiful, consistent French tips effortlessly. The simple press, lift, and BAM method makes it an indispensable french tip tool for nails for home DIY enthusiasts.
Using French tip cutters and guides for sharp lines
French tip cutters, also known as edge trimmers, are another effective type of french tip tool for nails designed for creating crisp, uniform smile lines. These metal tools come in various shapes, such as U, V, or almond, allowing you to select the curvature that best complements your nail shape. To use them, you typically apply a base coat, then place the cutter over your nail, applying the tip polish along the curved edge. This method ensures a perfectly defined and sharp line, which is characteristic of a salon-quality French manicure.
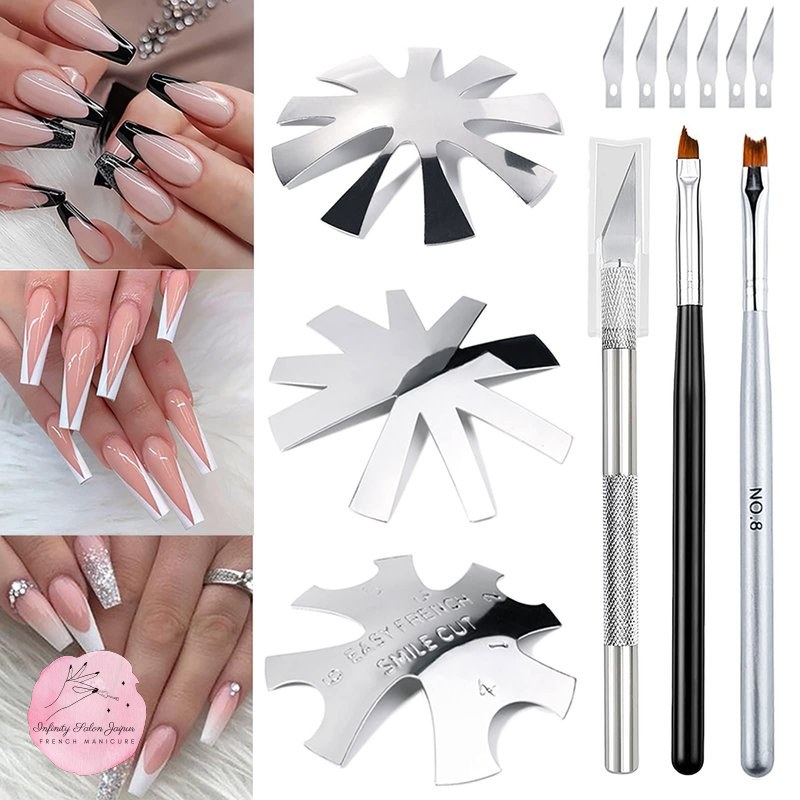
While cutters provide superior precision, they might require a bit more practice to master compared to stampers. However, once you get the hang of it, they are invaluable for achieving consistently professional results, especially for those who prefer acrylic or gel extensions. The various shapes available allow for creative freedom, enabling you to experiment with different French tip styles, from classic to modern. Many sets even include brushes and cutting knives to complete your nail artistry toolkit.
Exploring French manicure guide stickers for precision
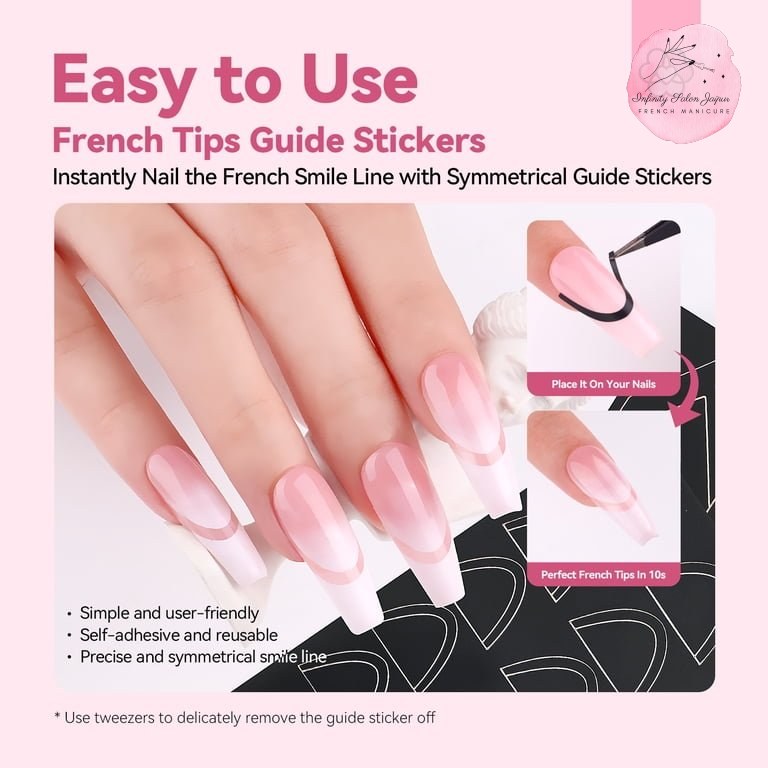
French manicure guide stickers are adhesive strips that adhere to your nail, leaving the tip exposed for polish application. These guides are a straightforward french tip tool for nails, ideal for achieving a clean and symmetrical smile line without needing a steady hand. They come in various shapes and sizes, from classic curves to more intricate designs, providing versatility for different looks. After applying your base coat, you simply place the sticker on your nail, paint the tip, and then carefully peel off the sticker to reveal a crisp line.
The simplicity of guide stickers makes them a favorite among those new to DIY French manicures. They eliminate the worry of uneven lines and messy edges, ensuring a polished finish every time. While they are incredibly user-friendly, it’s important to ensure the sticker is firmly pressed down to prevent polish from bleeding underneath. These stickers are an excellent option for quick touch-ups or for anyone looking for a foolproof way to achieve perfect French tips with minimal effort.
Choosing the right french tip tool for nails for your needs
Selecting the ideal french tip tool for nails depends largely on your personal preferences, skill level, and the specific look you aim to achieve. Each tool offers distinct advantages, and understanding these can help you make an informed decision. Consider how often you plan to do French manicures, the complexity of the design you desire, and your comfort level with different application techniques. This thoughtful approach ensures you pick a tool that enhances your nail art experience and delivers satisfactory results consistently.
Assessing your skill level and experience
For beginners or those with limited experience in nail art, silicone stampers and guide stickers are generally the easiest to use. These tools require less precision and provide more forgiving results, making them excellent starting points. Silicone stampers allow for quick application and offer flexibility, while guide stickers provide a clear boundary for painting. On the other hand, if you possess a steadier hand and seek more advanced control, French tip cutters might be more suitable. These tools demand a bit more skill but reward you with ultra-sharp, professional-grade lines. At Infinity Salon Jaipur, we encourage everyone to start with tools that build confidence, gradually experimenting with more advanced options as their skills grow.
Considering the type of French manicure you desire
The style of French manicure you wish to create also plays a role in tool selection. For a classic, subtle smile line, a silicone stamper or a curved guide sticker works perfectly. If you prefer a very deep or sharply angled V-shaped tip, specific French tip cutters with corresponding designs will provide the best results. For those who enjoy experimenting with different tip shapes and sizes, a kit that includes multiple stamper heads or a variety of cutter styles offers greater versatility. Think about the overall aesthetic you want to achieve – whether it’s a traditional elegant look or a more modern, bold statement – and choose your french tip tool for nails accordingly.
Reading reviews and recommendations
Before making a purchase, it’s always beneficial to read reviews and recommendations from other users. Look for feedback on the ease of use, durability, and effectiveness of different french tip tools for nails. Online communities and beauty blogs often provide honest insights into various products, helping you avoid common pitfalls. Additionally, consider trusted brands that specialize in nail art tools, as they often offer higher quality and better performance. Infinity Salon Jaipur always recommends researching to find tools that consistently deliver excellent results, ensuring your investment is worthwhile and your French manicures are consistently flawless.
Essential tips for using your french tip tool for nails
Mastering the use of your french tip tool for nails involves more than just selecting the right equipment; it also requires understanding proper techniques and best practices. A few essential tips can significantly enhance your results, ensuring your French manicures are consistently clean, crisp, and long-lasting. From preparing your nails to applying the polish and finishing touches, these guidelines will help you achieve a professional-quality look every time you use your French tip tool.
Preparing your nails for a flawless French tip application
Proper nail preparation is the cornerstone of any successful manicure, especially a French tip. Start by thoroughly cleaning your nails, ensuring they are free of any old polish, oils, or debris. Push back and trim your cuticles, and then gently buff the nail surface to create an even texture. Apply a high-quality base coat to protect your nails and help the polish adhere better. This foundational step is crucial for preventing chipping and extending the life of your French manicure. A clean, smooth canvas will allow your french tip tool for nails to perform optimally, resulting in a cleaner, more defined smile line.
Applying polish with precision for a sharp smile line
When applying the white tip polish, precision is key. If using a silicone stamper, apply a thin line of white polish to the stamper head, then gently press your nail into it, rolling slightly to transfer the polish. For French tip cutters, hold the tool firmly against your nail and paint along the curved edge. When using guide stickers, ensure they are securely placed before painting the tip. Always apply thin, even coats of polish, allowing each layer to dry slightly before adding the next. This prevents streaks and ensures a smooth, opaque tip. Patience and a steady hand, combined with your chosen french tip tool for nails, will yield the best results for a crisp smile line.
Finishing touches and maintenance for lasting results
Once your French tips are dry, apply a high-quality top coat to seal in your design and add a glossy finish. The top coat protects your manicure from chipping and adds shine, making your nails look professionally done. For even longer-lasting results, consider applying a second top coat a day or two after your initial manicure. To maintain your French tips, moisturize your cuticles daily and wear gloves when performing household chores that involve water or harsh chemicals. These simple steps will keep your French manicure looking fresh and beautiful for an extended period, ensuring your efforts with your french tip tool for nails are well rewarded.
Advanced techniques and creative uses for your french tip tool for nails
Beyond the classic white tip, your french tip tool for nails can unlock a world of creative possibilities. Exploring advanced techniques allows you to personalize your French manicures, adding unique twists and modern interpretations to this timeless style. Whether you’re experimenting with different colors, textures, or embellishments, these tools can help you elevate your nail art game and express your individuality. Dive into these advanced uses to discover how versatile your French tip tool truly is.
Experimenting with colored and glitter French tips
Who says French tips always have to be white? Your french tip tool for nails is perfect for experimenting with colored and glitter tips. Instead of traditional white polish, try using vibrant hues like electric blue, neon pink, or deep burgundy for a bold statement. For a touch of sparkle, opt for glitter polishes or apply fine loose glitter over a wet base coat on the tip. This simple switch can transform a classic French manicure into a fun, modern look that matches your outfit or mood. Using your stamper or cutter, you can achieve clean lines with any color, making it easy to play around with different combinations and create unique designs.
Creating ombre or gradient French tips
For a more artistic approach, try creating ombre or gradient French tips using your french tip tool for nails. This technique involves blending two or more colors seamlessly on the tip of your nail, transitioning from one shade to another. You can achieve this by applying two colors side-by-side on your stamper or sponge, then lightly dabbing it onto your nail. The stamper’s curved edge helps maintain the smile line while allowing the colors to blend beautifully. This creates a soft, diffused look that adds depth and sophistication to your French manicure. With a bit of practice, you can master the art of ombre and achieve stunning gradient effects that elevate your nail art to the next level.
Incorporating nail art and embellishments with your tool
Your french tip tool for nails can also serve as a foundation for incorporating more elaborate nail art and embellishments. Once you’ve created your perfect French tip, you can add tiny rhinestones, decals, or hand-painted designs to personalize your manicure further. For example, you could add a delicate line of glitter along the smile line, or a small floral design on one accent nail. Using your French tip tool ensures that the base of your design is flawless, allowing your additional embellishments to truly stand out. This approach allows you to combine the elegance of a French manicure with your unique artistic flair, creating truly bespoke nail art. The possibilities are endless when you combine precision with creativity.
Frequently asked questions about french tip tools for nails
What is the easiest french tip tool for nails for beginners?
For beginners, silicone French tip stampers are often considered the easiest to use. Their clear design allows for precise placement, and the simple press-and-lift method helps create consistent smile lines with minimal effort. Guide stickers are also a great option for a foolproof application.
Can I use a french tip tool for nails with gel polish?
Yes, most french tip tools for nails, especially silicone stampers and cutters, are perfectly compatible with gel polish. When using gel, remember to cure each layer under a UV/LED lamp as instructed to ensure proper adhesion and longevity. The precision of these tools helps in creating sharp gel French tips.
How do I clean my french tip tool for nails?
The cleaning method depends on the type of tool. Silicone stampers can typically be cleaned by gently dabbing them with a lint roller or washing them with mild soap and water. Metal cutters can be cleaned with rubbing alcohol or nail polish remover, while guide stickers are disposable after one use. Always ensure tools are completely dry before storing.
What is the best way to get a perfectly curved smile line?
To achieve a perfectly curved smile line, proper technique with your chosen french tip tool for nails is crucial. For stampers, ensure you apply a thin, even layer of polish and roll your nail smoothly. With cutters, select the curve that best fits your nail shape and apply steady pressure. Practice makes perfect, so don’t be discouraged if it takes a few attempts.
Are there reusable french tip tools for nails?
Yes, many french tip tools for nails are reusable. Silicone stampers and metal French tip cutters are designed for multiple uses, making them a cost-effective choice in the long run. Proper cleaning and storage after each use will help maintain their effectiveness and extend their lifespan for countless manicures.
Concluding your journey to perfect french tips
Discovering the ideal french tip tool for nails is a game-changer for anyone aspiring to master the timeless elegance of a French manicure at home. This guide has illuminated the various tools available, from user-friendly silicone stampers to precision-driven cutters, empowering you to choose the best option for your unique needs and skill level. We’ve covered everything from essential preparation to advanced creative techniques, ensuring you have all the knowledge to achieve salon-quality results.
Armed with these insights and the right french tip tool for nails, you can confidently create stunning, flawless French manicures that reflect your personal style. At Infinity Salon Jaipur, we are dedicated to helping you achieve beautiful nails, whether you visit our salon or embark on your DIY nail art journey. Embrace the art of the French tip, and let your nails become a canvas for effortless sophistication. Visit us at Infinity Salon Jaipur for more tips and professional nail care services!