Achieving a crisp, elegant French manicure at home can feel like a daunting task, but with the right tools, it’s entirely within reach. The secret to flawless French tips lies in choosing the correct nail art brush. At Infinity Salon Jaipur, we understand the importance of precision and quality when it comes to nail art. This guide will walk you through everything you need to know to select the ideal nail art brush for French tips, ensuring beautiful results every time.
Many aspiring nail artists and DIY enthusiasts often struggle with creating that iconic smile line. A common issue is using brushes that are too soft or not specifically designed for the task, leading to uneven or blurry lines. We’ll explore various brush types, materials, and techniques to help you master the French manicure with ease.
Understanding various types of nail brushes for french tips
When it comes to creating perfect French tips, not all brushes are created equal. The market offers a variety of brushes, each designed with specific features to help you achieve different effects. Understanding these types is crucial for selecting the best nail brush for French tips that suits your skill level and desired outcome.
The most common and effective brushes for French tips include curved brushes, oblique brushes, and flat brushes. Each of these tools brings a unique advantage to your nail art arsenal. Exploring their characteristics will empower you to make an informed decision and elevate your French manicure game.
Curved french tip brushes for precise lines
The curved French tip brush is a game-changer for anyone aiming for perfectly symmetrical smile lines. Its unique U-shaped or curved bristle design naturally guides your hand to create that classic French tip curve with minimal effort. This brush type is particularly popular among professionals because it allows for a smooth, sweeping motion that results in a clean, consistent line.
When using a curved brush, it’s important to load a moderate amount of polish onto the brush, ensuring it doesn’t overload the bristles. A dry nail surface is ideal for application, allowing the polish to adhere cleanly without bleeding. The flexibility of its nylon bristles often provides total control, making it easier to carve out deep, defined tips.
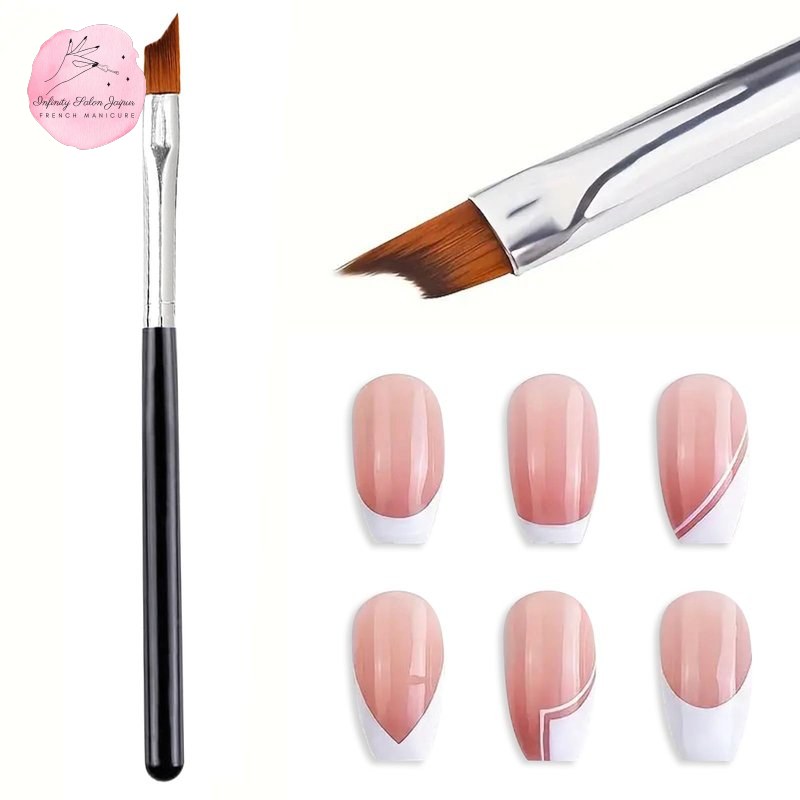
Many curved brushes, like the ones highlighted in the image, are designed for salon-quality results. They are not only great for beginners due to their intuitive shape but also for experienced technicians looking for efficiency and perfection. Mastering this brush can significantly reduce the time spent on French tips while enhancing the quality.
Oblique nail brushes for french manicure definition
Oblique nail brushes, also known as slanted or angled brushes, are another excellent choice for defining crisp French tips. Their angled bristles allow for sharp, clean lines and offer great versatility. This type of brush is especially good for creating very precise and thin smile lines, as well as for detailed clean-up around the cuticle area.
The angled edge provides a natural guide, allowing you to sweep the brush across the nail to form the desired curve. For those who prefer a more customized curve, the oblique brush offers greater control over the angle and depth of the tip. It’s often favored by artists who like to adjust their technique based on the natural nail shape.
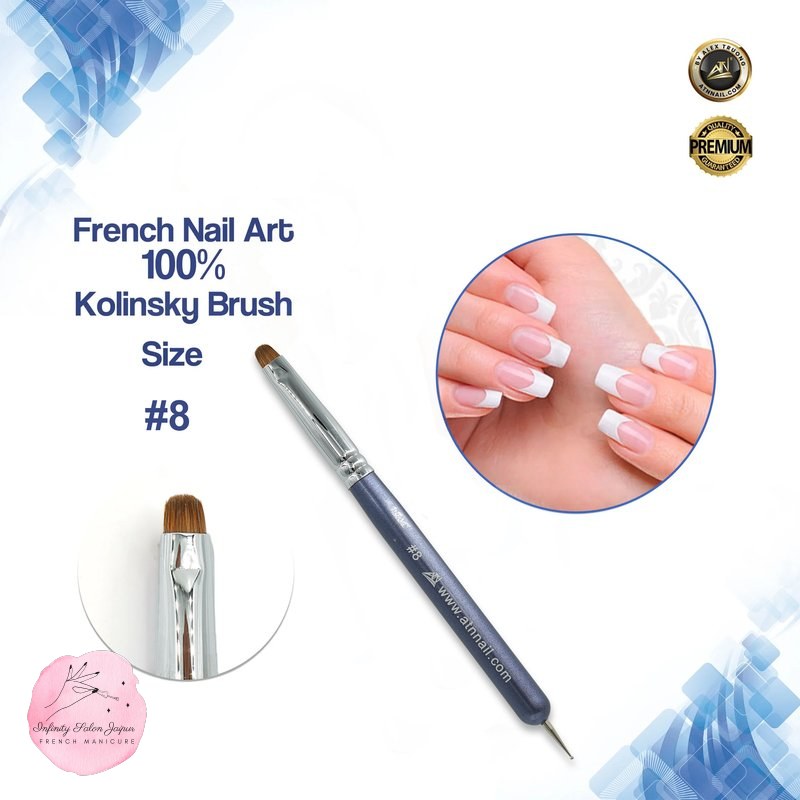
As depicted in the accompanying image of the ATN French Nail Art Brush, these tools often feature high-quality Kolinsky bristles, which are known for their excellent polish retention and precise application. Such professional salon quality brushes by brands like Madam Glam can be used with soak-off gels or nail art paint gels, making them perfect for shading and blending nail art as well.
Flat french tip brush for clean lines and versatility
While often associated with clean-up and broader applications, a flat French tip brush can also be incredibly effective for creating sharp, straight French lines and for refining the smile line. These brushes typically have a straight edge, making them ideal for those who prefer a more angular or graphic French tip.
Beyond traditional French tips, flat brushes are highly versatile. They can be used to create ombre effects, block colors, and even intricate geometric designs. For French tips, the longer hairs of a flat brush allow for smoother, sweeping movements, which is key for achieving crisp and professional-looking results. They are also excellent for applying a base coat or top coat neatly.
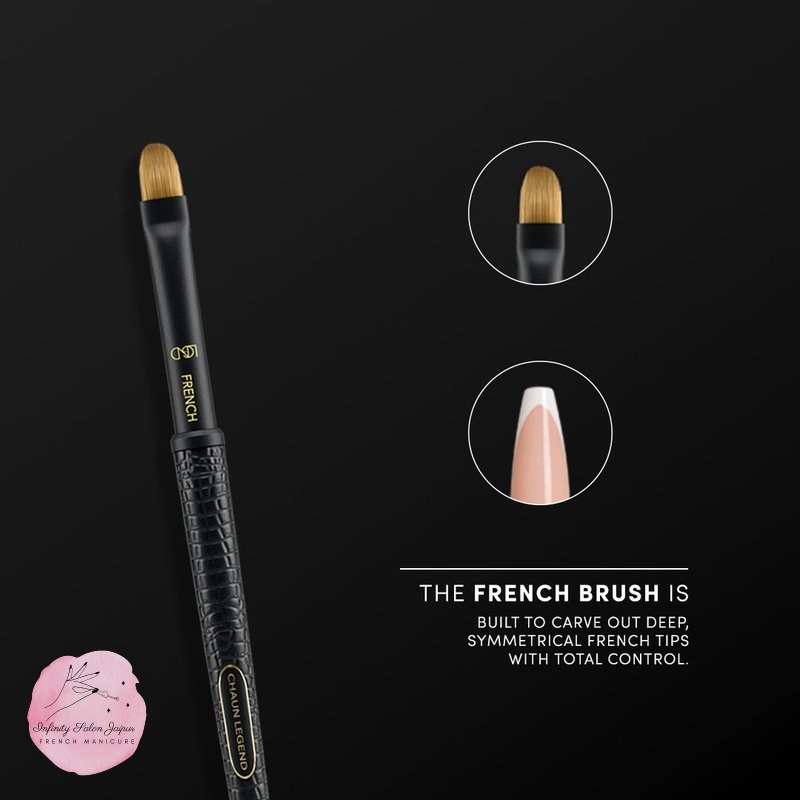
The Chaun Legend Nail Art Brush shown in the image is an example of a high-quality flat brush that can be instrumental in your French manicure endeavors. Its sturdy construction and precise cut are designed for long-lasting performance, even with frequent use. When selecting a flat brush, look for one with firm yet flexible bristles that maintain their shape over time.
Choosing the right nail art brush for french tips
Selecting the ideal nail art brush for French tips goes beyond just knowing the different types. You need to consider several factors to ensure you get a tool that performs well and feels comfortable in your hand. The right brush can significantly improve the quality and ease of your French manicures, whether you’re a beginner or a seasoned pro.
At Infinity Salon Jaipur, we always advise our clients to consider bristle material, brush size, and handle ergonomics. These elements play a crucial role in how the brush functions and how much control you have during application. Making an informed choice will save you frustration and lead to more satisfying results.
Considering bristle material for a smooth application
The material of the bristles is paramount when choosing a nail art brush for French tips. Natural hair bristles, often made from Kolinsky sable, are highly prized for their exceptional ability to hold polish and create smooth, even lines. They are known for their flexibility, durability, and fine tips, which allow for intricate details and precise smile lines.
Synthetic bristles, typically made from nylon, are a more affordable and animal-friendly alternative. Modern synthetic brushes have come a long way and can offer excellent performance, especially those designed with flexible how to Dip French tip curved brush into polish and make sure to apply to a dry nail. They are also easier to clean and maintain, making them a great option for everyday use.
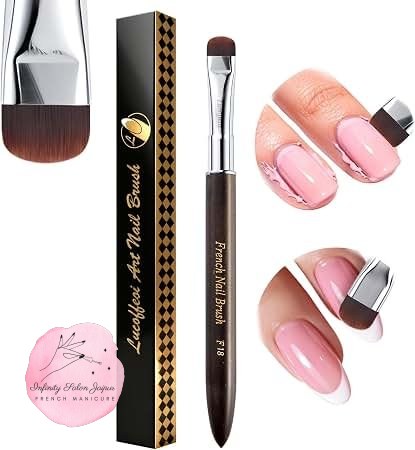
The Lucoffeoi French Tip Brush in the image, with its wooden handle, exemplifies a tool that combines functionality with comfort. Whether natural or synthetic, the key is to choose bristles that maintain their shape, do not fan out easily, and provide the control you need for consistent French tips. Many users find that inexpensive brushes fan out after a while, making a good quality brush a worthwhile investment.
Selecting the ideal brush size for french tips
Brush size is another critical factor influencing the precision of your French tips. Smaller brushes (e.g., sizes 2-4) are excellent for intricate details and very thin smile lines, perfect for smaller nail beds or those who prefer a delicate French look. Larger brushes (e.g., sizes 6-8) are better suited for broader, bolder French tips and can cover more surface area efficiently.
Many brush sets offer a range of sizes, allowing you to experiment and find what works best for you. For instance, a French tip brush specifically designed with a curved edge will naturally guide you to create the perfect smile line, regardless of whether it’s a smaller or slightly larger size. The overall length of the bristles also contributes to the sweeping movement capability.
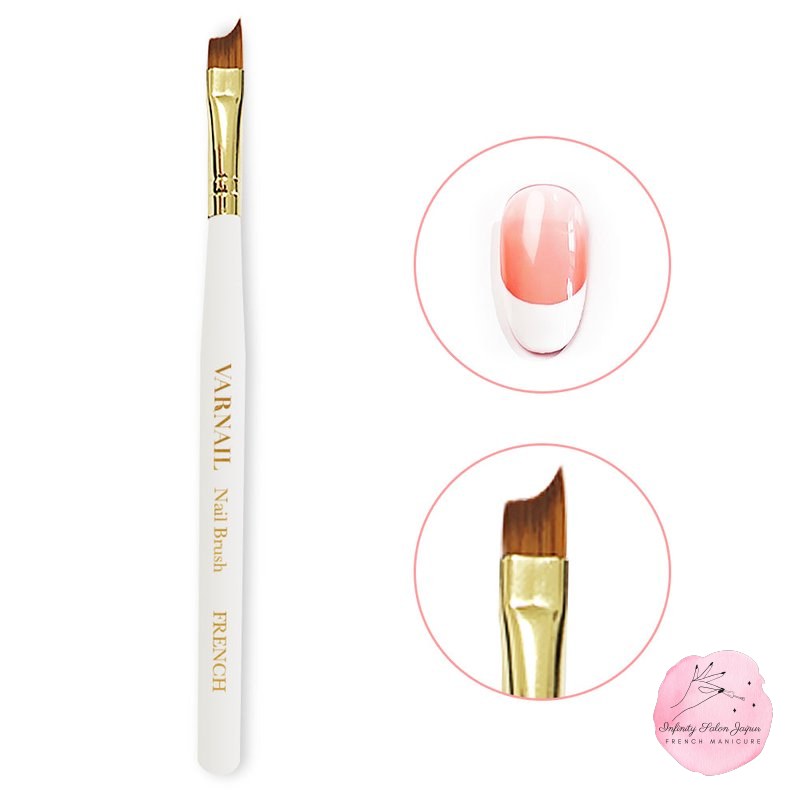
The VARNAIL French Tip Nail Brush, as pictured, demonstrates how different sizes can be chosen to match individual nail art needs. If you’re just starting, a medium-sized brush might be a good compromise, offering enough precision without being too challenging to control. Remember, the goal is to achieve deep, symmetrical French tips with total control.
Ergonomics and handle design for ease of use
The handle of your nail art brush might seem like a minor detail, but it significantly impacts comfort and control during extended nail art sessions. A well-designed handle should feel balanced and comfortable in your hand, reducing fatigue and allowing for steady, precise movements. Look for handles that offer a good grip, whether they are made of wood, acrylic, or metal.
Some brushes feature ergonomic designs, such as thicker handles or textured grips, to enhance control and prevent slipping. A comfortable handle allows you to maintain a consistent angle and pressure, which is crucial for achieving crisp and even French tips. If you find your brushes fanning out after a while, it might also be partly due to how you hold and apply pressure, making ergonomics even more important.
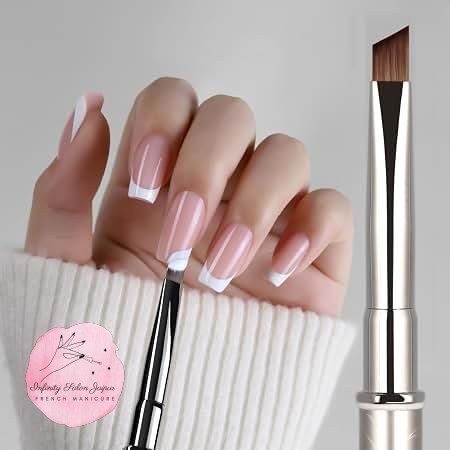
The Honey Joy French Tip Nail Brush shown in the image exemplifies a thoughtful design that prioritizes both precision and user comfort. When browsing for your next french tip brush for nails, don’t overlook the handle’s feel and balance. A good grip and comfortable design will make all the difference in achieving those time-consuming but rewarding French tips.
Advanced tips for using your nail art brush for french tips
Once you’ve chosen the perfect nail art brush for French tips, mastering its use requires a few advanced techniques and practices. Even the best brush needs a skilled hand to achieve truly professional results. These tips will help you refine your application, maintain your brushes, and consistently create stunning French manicures.
From proper polish loading to precise application and effective clean-up, each step contributes to the overall success of your nail art. Infinity Salon Jaipur encourages experimentation and practice to develop your unique style and achieve flawless finishes. Let’s delve into how you can maximize the potential of your new brush.
Loading polish effectively for clean french tips
Properly loading your nail art brush for French tips is crucial for achieving clean and crisp smile lines. Overloading the brush can lead to messy, thick lines, while too little polish will result in patchy application. The key is to pick up just enough polish to cover the desired area in one smooth stroke.
Dip only the tip of your brush into the polish, ensuring the bristles are evenly coated but not saturated. If using a curved French tip brush, dip the curve into the polish and gently tap off any excess on the edge of the bottle. This technique prevents bleeding and ensures a sharp, defined edge for your French tip.
The oblique French nail brush pictured is excellent for this, as its angle helps distribute the polish evenly. When working with UV gel or nail art paint gels, remember that their consistency might differ from traditional lacquer, requiring slight adjustments in loading. Always ensure your nail surface is dry and free of oils for optimal adhesion.
Techniques for achieving a perfect smile line
Creating that coveted perfect smile line is the hallmark of a beautiful French manicure. Several techniques can help you achieve this, regardless of the nail brush for French tips you’re using. One popular method involves placing a small bead of polish at the center of the nail tip, then using the brush to pull it outwards towards the sides, forming the curve.
For curved brushes, position the brush with its curve aligning with the desired smile line, then gently sweep across. With oblique brushes, you can use the angled edge to “carve out” the smile line, starting from one side and sweeping towards the center, then repeating from the other side. Practice is key, and don’t be afraid to experiment with different angles and pressures.
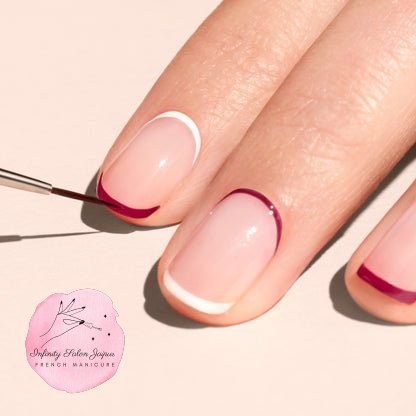
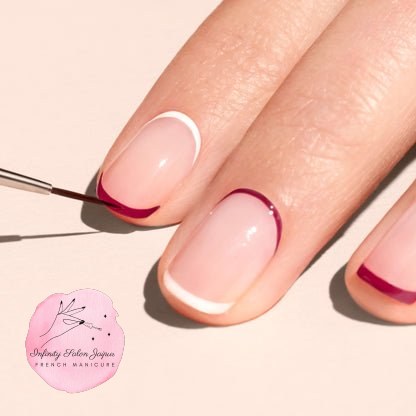
While the image shows a liner brush, the principles of steady handwork apply. Remember that straight lines and French tips often benefit from longer hairs on brushes, allowing for smoother, sweeping movements. If your current french tip brush for nails feels unwieldy, it might be time to invest in one specifically designed for precision work, like those used at Infinity Salon Jaipur.
Cleaning and maintaining your french tip brushes
Proper cleaning and maintenance are essential to extend the lifespan of your nail art brush for French tips and ensure its consistent performance. After each use, immediately clean your brush to prevent polish from drying and hardening in the bristles. For regular nail polish, a brush cleaner or acetone-free nail polish remover works well.
For gel polishes, special gel brush cleaners or isopropyl alcohol are recommended. Gently wipe the bristles on a lint-free pad until all color is removed, then reshape the bristles and store the brush horizontally or with the bristles facing up to prevent bending. Never leave brushes soaking in liquids for extended periods, as this can damage the bristles and handle.
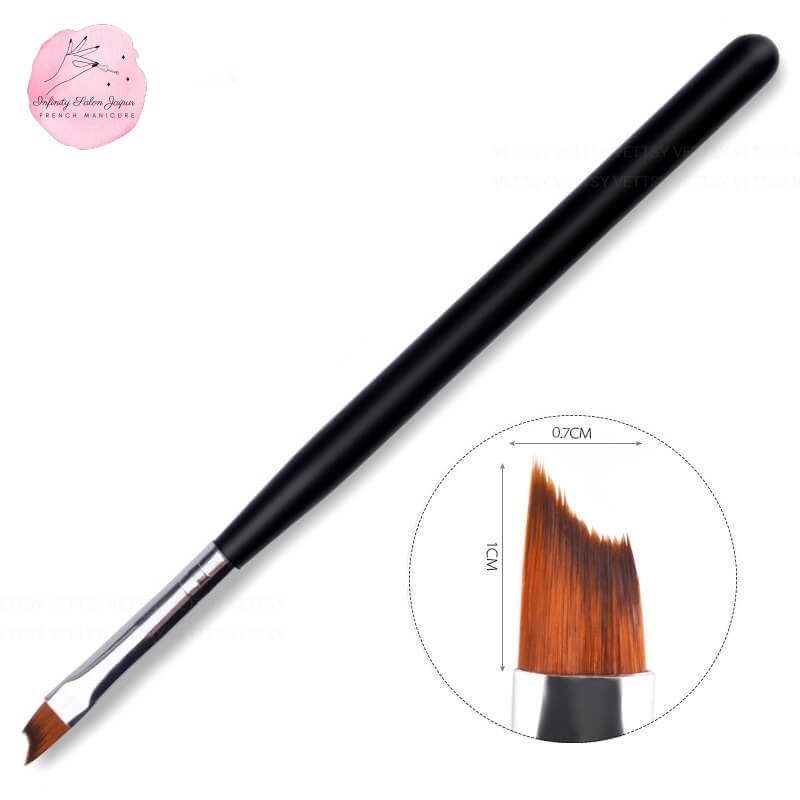
As seen with the Vettsy French Brush, a well-cared-for brush will maintain its shape and precision, making your French tip applications consistently beautiful. A really good french tip brush is an investment, and proper care ensures it doesn’t fan out after a while, allowing you to create perfect French tips every time without the frustration of worn-out bristles.
Troubleshooting common issues with french tips
Even with the best nail art brush for French tips, you might encounter some common challenges. Uneven lines, bleeding polish, or tips that aren’t quite symmetrical can be frustrating. Understanding how to troubleshoot these issues will help you refine your technique and achieve the flawless French manicure you desire.
Don’t be discouraged if your first few attempts aren’t perfect. French tips are so time-consuming to master, but with patience and the right adjustments, you’ll soon be creating salon-worthy results. Let’s look at some frequent problems and their solutions to help you overcome them.
Addressing uneven or wobbly smile lines
Uneven or wobbly smile lines are a common frustration when attempting French tips. This often stems from an unsteady hand, inconsistent pressure, or an unsuitable brush. To combat this, ensure your hand is stable by resting your wrist or elbow on a flat surface.
If your brush tends to fan out after a while, invest in a professional salon quality brush that holds its shape. For example, a French Tip Curved Brush made of nylon bristles that are flexible can provide the control needed for a smooth, even curve. Practice drawing the smile line on a piece of paper first to build muscle memory and improve your stroke consistency.
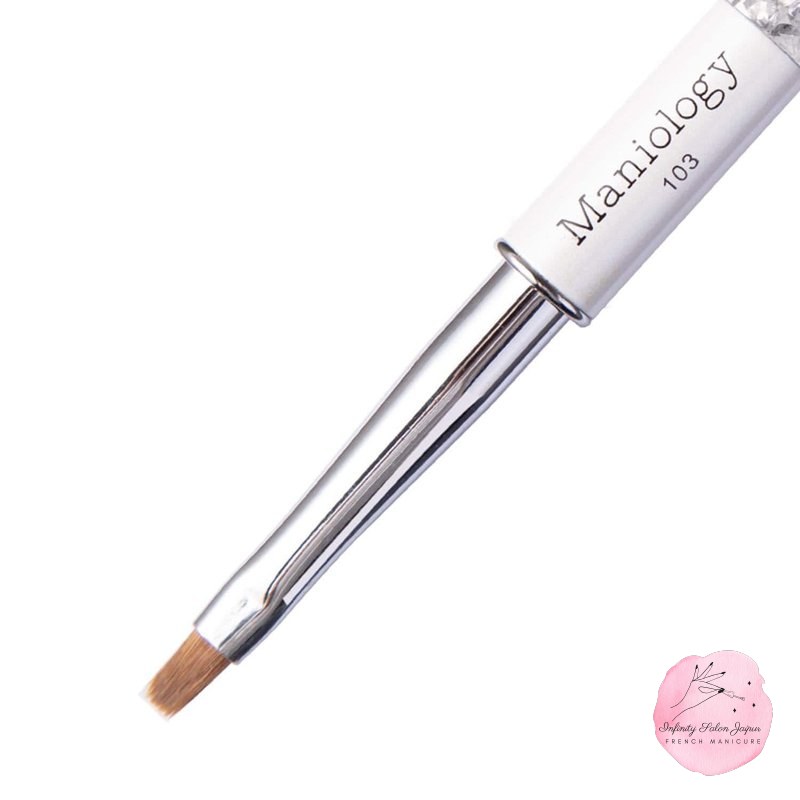
The Maniology French Flat Tip Brush, as seen in the image, highlights the kind of precision tool that can help create clean lines and rectify minor imperfections. If you struggle with freehand, consider using French tip guides or stencils initially to help establish a clean line before going freehand.
Preventing polish bleeding and smudging
Polish bleeding under the tip or smudging can ruin an otherwise perfect French manicure. This usually happens when the base coat isn’t fully dry, the polish is applied too thickly, or the brush is overloaded. Always ensure each layer of polish is completely dry before applying the next.
Apply thin, even coats of polish for your French tips. A precision-cut nail art brush for French tips will allow for controlled application, reducing the chances of excess polish seeping. If you notice any bleeding, use a small cleanup brush dipped in acetone-free remover to gently tidy the edges before the polish fully dries.
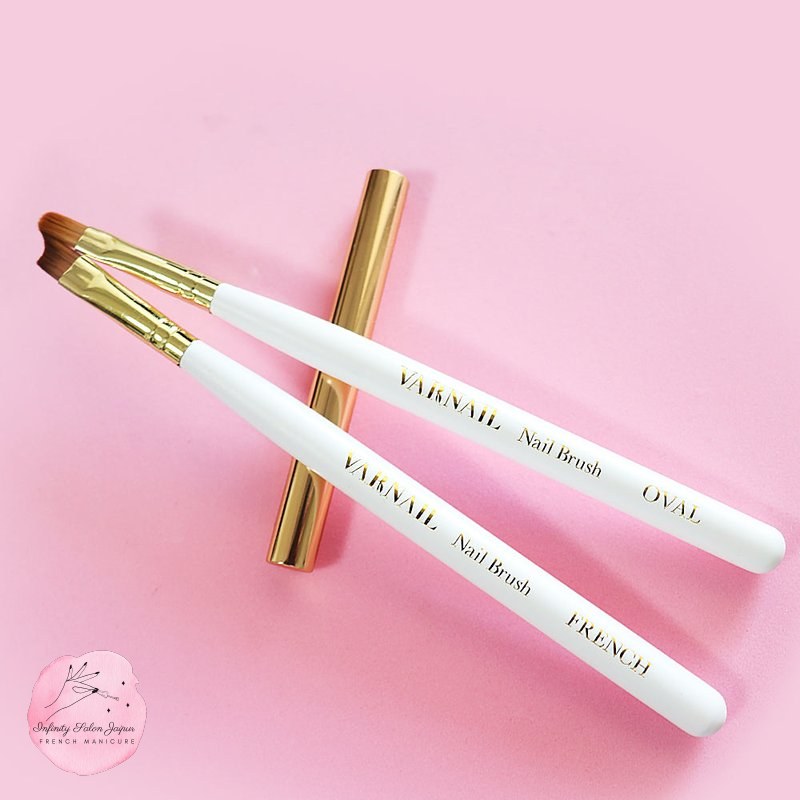
The VARNAIL French Tip Nail Brush, as illustrated, is designed to help prevent these issues with its fine tips. Remember, applying a good quality top coat after your French tips are dry will also help seal everything in and protect against smudges, giving your manicure a durable and glossy finish.
Frequently asked questions about nail art brushes for french tips
What is the best nail art brush for french tips?
The best nail art brush for French tips often depends on personal preference and skill level, but curved and oblique brushes are highly recommended for creating precise smile lines. A good quality brush will have durable bristles that maintain their shape, whether natural or synthetic.
Can I use a regular nail brush for french tips?
While you can attempt French tips with a regular nail brush, specialized French tip brushes (curved, oblique, or specific flat types) are designed for precision and control, making it significantly easier to achieve clean and symmetrical smile lines.
How do I clean my nail brush for french tips?
To clean your nail brush for French tips, gently wipe excess polish, then swirl the bristles in a brush cleaner or acetone-free remover until clean. Reshape the bristles and allow them to air dry. Avoid soaking brushes for long periods.
Why do my french tip brushes fan out?
French tip brushes often fan out due to poor quality bristles, improper cleaning, or incorrect storage. Investing in a professional-grade brush and following proper maintenance steps can help prolong its lifespan and maintain its precise shape.
Are synthetic or natural bristles better for a french tip brush?
Both synthetic and natural bristles have their advantages. Natural bristles (like Kolinsky) are excellent for polish retention and fine detail, while modern synthetic bristles are durable, easier to clean, and often more affordable. The best choice depends on your budget and preference.
Conclusion
Choosing the right nail art brush for French tips is a pivotal step towards mastering the elegant French manicure. From understanding the nuances of curved, oblique, and flat brushes to considering bristle material, size, and handle ergonomics, each element plays a crucial role in achieving that flawless smile line. We hope this comprehensive guide has empowered you with the knowledge needed to select the perfect nail brush for your French tips, making your nail art journey at home both enjoyable and successful.
Remember that practice, combined with the right tools, is key to perfecting your technique. Don’t be discouraged by initial challenges; every beautifully crafted French tip is a testament to patience and the quality of your nail art brush for French tips. For all your nail care and beauty needs, including expert advice and professional services, we invite you to visit Infinity Salon Jaipur, where beauty meets precision.